
Key Takeaways
01.
The Android app development process should be treated as a sequence of product and engineering decisions, not a coding checklist.
02.
The most expensive mistakes usually happen before development: unclear scope, weak assumptions, unsuitable architecture or underestimated integrations.
03.
Kotlin and Jetpack Compose form the modern native Android foundation, while cross-platform approaches can be appropriate when Android and iOS both matter.
04.
Device diversity makes adaptive UX, real-device testing and performance engineering essential.
05.
Backend architecture, APIs, integrations and offline behaviour can affect complexity more than screen count.
06.
Google Play requirements, privacy, security and release preparation belong inside the development lifecycle.
07.
Launch is the start of product optimisation, not the finish line.
Building an Android app is easy to describe and much harder to execute well.
The basic formula sounds simple:
Idea → Design → Development → Testing → Launch
But that sequence hides the decisions that determine whether the product actually works as a business. What problem is it solving? Who will use it? What belongs in the first release? Should the product be native Android or cross-platform? How will it connect to backend systems? Which devices matter? How will security and performance be tested? What happens after the app reaches Google Play?
Those decisions shape the real Android app development process.
In 2026, release planning also has to account for current Google Play requirements. Since August 31, 2026, new apps and app updates generally need to target Android 16, API level 36 or higher for Google Play submission, subject to platform-specific exceptions. Existing apps generally need to target Android 15/API 35 or higher to remain available to new users on newer Android versions. Google's current target API requirements should therefore be part of the engineering plan.
The bigger lesson is simple:
A successful Android app is not the result of good coding alone. It comes from making the right product, architecture, testing and launch decisions in the right order.
01
What the Android App Development Process Really Looks Like
A commercial Android project is better understood as a chain of decision gates:
Problem → Scope → Experience → Architecture → Engineering → QA → Release → Learn → Improve
| Stage | Main question | Typical output |
|---|---|---|
| Discovery | What problem are we solving? | Product brief |
| Scope | What does the first release need? | MVP backlog |
| UX | How should the product work? | Prototype + UI |
| Architecture | How should the system be built? | Technical blueprint |
| Backend | How will mobile connect to the business? | API/integration plan |
| Development | Can the workflow work end to end? | Working increments |
| QA | Is it reliable? | Test evidence |
| Beta | Does it work with real users? | Release candidate |
| Launch | Is it ready for Google Play? | Production release |
| Optimisation | What should change next? | Evidence-led roadmap |
The Android app development lifecycle is iterative. Testing can expose an architecture problem. Analytics can expose a UX problem. Beta feedback can change the MVP. A good process makes those changes visible before they become expensive.
Designoweb approaches Android as part of a wider product-engineering lifecycle across Android development, mobile solutions, product design and product development.
02
Step 1: Validate the App Idea
The first step should not be opening Android Studio.
It should be understanding why the application needs to exist.
Ask:
- Who is the primary user?
- What problem are they facing?
- How are they solving it today?
- Why is mobile a better channel?
- What behaviour should change?
- What business outcome should that create?
An e-commerce app might aim to increase repeat purchasing. A field-service app might reduce paperwork. A travel app might enable real-time navigation and coordination.
The technology can be similar. The product logic is not.
Start with the core journey
Instead of starting with twenty screens, define the main job:
E-commerce: Search → Product → Cart → Payment → Confirmation
Field service: Login → Job → Customer → Work → Completion → Sync
Travel: Search → Plan → Invite → Navigate → Communicate → History
This quickly shows what the first release actually needs.
Validate risky assumptions early
Every app contains assumptions about user demand, APIs, payments, hardware, data and operational scale. Identify the assumptions that could invalidate the project and test them before full development.
Designoweb's prototyping services can support this stage by turning uncertain workflows into testable product experiences.
03
Step 2: Define the MVP and Product Scope
A feature list is not a product strategy.
Without boundaries, the Android app development process quickly expands into profiles, chat, social features, recommendations, loyalty, integrations and reporting before the core product is proven.
Define the MVP around one job
A useful MVP is the smallest version capable of testing the most important business hypothesis.
For a local-services marketplace, that could be:
- registration
- provider profiles
- search
- availability
- booking
- notifications
- basic payment
- admin management
Features such as loyalty tiers or advanced recommendations can wait until evidence justifies them.
Designoweb's MVP development services can help convert that product hypothesis into a focused first release.
Use three scope buckets
| Bucket | Meaning | Action |
|---|---|---|
| Must have | Core journey cannot work without it | First release |
| Should have | Valuable but not essential | Add selectively |
| Later | Useful future capability | Post-launch backlog |
Also define acceptance criteria early. "Build login" is not enough; the requirement should explain the expected behaviour, error handling and session rules.
04
Step 3: Design the UX and Prototype the Core Journey
UX is where the product's logic becomes visible.
Start with:
User flow → Information hierarchy → Navigation → States → Visual design
Design the full experience, including loading, success, empty, error, offline and permission states.
Prototype the risky interaction
The best prototype answers a question.
Can users complete checkout?
Can a driver use the product safely while moving between steps?
Can a technician complete an inspection quickly?
Can a healthcare worker understand a complex result?
Designoweb's mobile app design services and prototyping services fit naturally here because design decisions can be validated before engineering cost increases.
Design for Android form factors
Android is not one screen size. Modern Android supports phones, tablets, foldables and other configurations.
Plan for:
Design area
- Small screens
- Tablets
- Foldables
- Landscape
- Text scaling
- Offline
- Permissions
What to consider
- Hierarchy and touch targets
- Expanded layouts
- Layout changes across states
- Alternate composition where needed
- Accessibility
- Clear recovery states
- Contextual requests
05
Step 4: Choose the Android Architecture and Tech Stack
Technology should follow the product.
Native Android: Kotlin and Jetpack Compose
For native Android development, Kotlin and Jetpack Compose provide the modern baseline.
Google's Android architecture recommendations encourage a clear UI layer and data layer, repositories for data access and unidirectional data flow. A domain layer can be added when application complexity justifies it.
A practical structure is:
Android App
↓
UI / Presentation
↓
Domain / Business Logic
↓
Data / Repositories
↓
APIs and Services
↓
Databases / Systems of Record
The commercial benefit is maintainability. Clear boundaries make it easier to change UI, backend integrations and business logic without rewriting unrelated parts.
Native vs cross-platform
Android does not automatically mean native-only development.
| Requirement | Native Android | Cross-platform |
|---|---|---|
| Android-specific hardware | Strong fit | Framework-dependent |
| Android-only product | Strong fit | Possible |
| Android + iOS | More platform-specific work | Strong fit |
| Deep device APIs | Strong fit | May need native modules |
| Shared codebase | Limited | High |
| Platform-specific UX | Strong fit | Requires deliberate implementation |
based on the product's platform, hardware, performance and maintenance requirements.
Plan the backend before coding accelerates
The Android client may depend on:
- APIs
- authentication
- databases
- payments
- notifications
- search
- analytics
- enterprise systems
- third-party services
A five-screen app can be more complex than a twenty-screen app if its backend and integrations are difficult.
06
Step 5: Plan the Backend, APIs and Integrations
A production mobile product should usually follow:
Android app → API layer → application services → systems of record
This centralises authentication, authorisation, validation, business rules, rate limiting and integration logic.
Plan offline behaviour
Field service, delivery, travel and other mobile workflows may encounter unreliable networks.
Depending on the product, the app may need:
- local caching
- queued actions
- retry logic
- conflict handling
- background synchronisation
Android's WorkManager is designed for persistent background work.
Define failure behaviour
Ask what happens when:
- an API times out
- a token expires
- a payment confirmation is delayed
- connectivity disappears
- a third-party service fails
These cases belong in architecture and testing, not only in production incident reports.
07
Step 6: Build the Android App in Iterations
Once scope, UX and architecture are clear, engineering can move into execution.
The strongest approach is usually incremental.
Build vertical slices
Instead of building all screens first, build complete workflows.
Login: UI → validation → authentication → session → error → analytics
Checkout: Product → Cart → Payment → Confirmation → Notification
Vertical slices expose integration problems early.
Establish engineering standards
Agree on:
- code conventions
- module structure
- code review
- dependencies
- logging
- versioning
- test expectations
- release strategy
Use CI/CD early
A mature pipeline can compile the application, run unit tests and static analysis, build release candidates and distribute test builds automatically.
The result is a shorter feedback loop and fewer late surprises.
08
Step 7: Test Security, Performance and Device Compatibility
Testing is not a final checkbox.
Functional and integration testing
Verify the core workflows and test failure conditions such as timeouts, expired sessions, partial responses, duplicate requests and network changes.
Device testing
Build an evidence-based test matrix covering:
| Dimension | Examples |
|---|---|
| OS | Supported minimum through current target |
| Form factor | Phone, tablet, foldable |
| Hardware | Low, mid, high-end |
| Network | Fast, slow, intermittent |
| Display | Small, large, portrait, landscape |
| Backend | Healthy, slow, partial failure |
Performance testing
Measure startup, rendering, scrolling, memory, battery, network latency and background work.
Google's Baseline Profiles guidance states that Baseline Profiles can improve code execution speed by about 30% from first launch for included code paths.
Security testing
Review authentication, authorisation, secure storage, network communication, permissions, secrets management and third-party dependencies.
Do not place sensitive cryptographic secrets directly in application source or resources. Sensitive business logic should be controlled through secure backend services where appropriate.
09
Step 8: Run Beta Testing and Prepare for Google Play
A product can pass internal QA and still fail with real users.
Beta testing should look for:
- crashes
- confusing flows
- slow screens
- permission issues
- device-specific bugs
- onboarding drop-off
- network failures
- analytics gaps
Google Play release readiness
The release plan should include:
- signed release build
- Android App Bundle
- store listing
- screenshots and metadata
- privacy policy
- Data safety information
- permissions and declarations
- reviewer access where required
- production rollout plan
Google's release guidance covers release preparation, while Play App Signing covers signing and app bundle protection.
Current target API requirement
As of August 31, 2026, new apps and app updates submitted to Google Play generally need to target Android 16/API 36 or higher, with separate requirements for certain form factors. Existing apps generally need Android 15/API 35 or higher to remain available to new users on newer Android versions. Check Google's current requirements before submission.
10
Step 9: Launch and Monitor the Production App
Launch starts the production feedback loop.
Track:
- crashes
- ANRs
- startup performance
- API failures
- retention
- conversion
- feature usage
- store reviews
- support issues
Android Vitals provides production stability and performance signals through Google Play.
Use production evidence to shape the backlog
Suppose users install the app, start registration and abandon halfway through.
The problem may not be a missing feature.
It could be:
- too many fields
- slow verification
- unclear value
- confusing navigation
- unnecessary permissions
That is why analytics and product management should remain connected after launch.
11
Step 10: Maintain, Optimise and Scale
An app released today still needs to work as Android, devices, APIs and business requirements change. Maintenance has multiple layers
| Area | Examples |
|---|---|
| Corrective | Bugs and crashes |
| Compatibility | OS and device changes |
| Performance | Startup, memory, network |
| Security | Dependencies and vulnerabilities |
| Product | New features and workflows |
| Operations | Backend scaling and incidents |
Scale the architecture with the product
As adoption grows, revisit API capacity, databases, caching, asynchronous processing, observability, analytics, cloud cost and release automation.
A strong architecture does not eliminate scaling work. It makes scaling more predictable.
Android App Development Cost, Timeline and Vendor Selection
What determines Android app development cost? There is no responsible single price for Android development. The main drivers are:
| Cost driver | Lower complexity | Higher complexity |
|---|---|---|
| Product | Few clear workflows | Many roles and edge cases |
| UX | Standard layouts | Advanced adaptive UX |
| Backend | Simple APIs | Real-time/distributed services |
| Integrations | Few APIs | Payments, ERP, CRM, hardware |
| Device features | Standard capabilities | Sensors, Bluetooth, camera, GPS |
| Security | Standard controls | Enterprise/regulated requirements |
| Testing | Narrow matrix | Broad device/network coverage |
A useful commercial model is:
Build cost + launch cost + operating cost + change cost
The last two are often missed. Cloud services, monitoring, support, security updates, Android compatibility and new business requirements continue after release.
How long does it take?
There is no universal timeline.
Estimate by layer:
Discovery → UX → Architecture → Android → Backend → Integrations → QA → Launch
The more uncertain the product or integration landscape, the more valuable early discovery and prototyping become.
How to choose an Android app development company
Do not compare vendors on hourly rate alone. Ask for:
| What to request | What it tests |
|---|---|
| Relevant case studies | Experience |
| Architecture diagram | Technical thinking |
| Device test strategy | QA maturity |
| MVP approach | Product discipline |
| Analytics plan | Measurement |
| Security approach | Risk management |
| Integration design | Backend capability |
| Maintenance model | Long-term ownership |
| Actual team profile | Delivery quality |
A good Android development partner should also be willing to say when a feature should wait, a cross-platform approach is sufficient, or a native app is not the best first investment. Designoweb provides Android app development services, alongside broader mobile solutions and product engineering.
12
When You Should Not Build an Android App
A strong product strategy includes reasons not to build.
The product is mostly informational
A responsive website may be enough when users mainly read content and leave.
Usage is too infrequent
A low-frequency service may not justify installation and ongoing maintenance.
Mobile creates no unique advantage
If every important workflow works equally well in a browser, the app needs a stronger reason to exist.
The backend is not ready
A mobile UI cannot fix unreliable APIs, fragmented business logic, weak authentication or poor data quality.
There is no post-launch owner
An app needs product ownership, analytics, maintenance and a roadmap.
Sometimes the better first move is a prototype. Sometimes it is a web product. Sometimes it is cross-platform development. Sometimes the right answer is not to build a new app.
13
How Designoweb Approaches Android App Development
At Designoweb, we treat Android development as part of the wider product engineering lifecycle.
The journey can move through:
Product discovery → MVP definition → UX/prototyping → architecture → Android engineering → backend integration → QA → launch → continuous improvement
Our Android app development services are supported by native app development, mobile app design, cross-platform engineering and product development services.
Real mobile product examples
Designoweb's RoadtripTribes case study describes a Flutter-based mobile product combining group trip planning, live tracking, navigation, walkie-talkie communication and Android Auto support.
The Pro Bike case study demonstrates another type of challenge: connecting mobile software with sensor data and real-time riding information across iOS and Android.
The takeaway is not that one technology should be copied across products.
It is that the product requirement should determine the architecture.
Author

Frequently Asked Questions
01
What is the Android app development process?
It covers product discovery, MVP scope, UX/UI design, architecture, backend and API integration, Android development, testing, beta release, Google Play launch and post-launch maintenance.
02
What are the steps in Android app development?
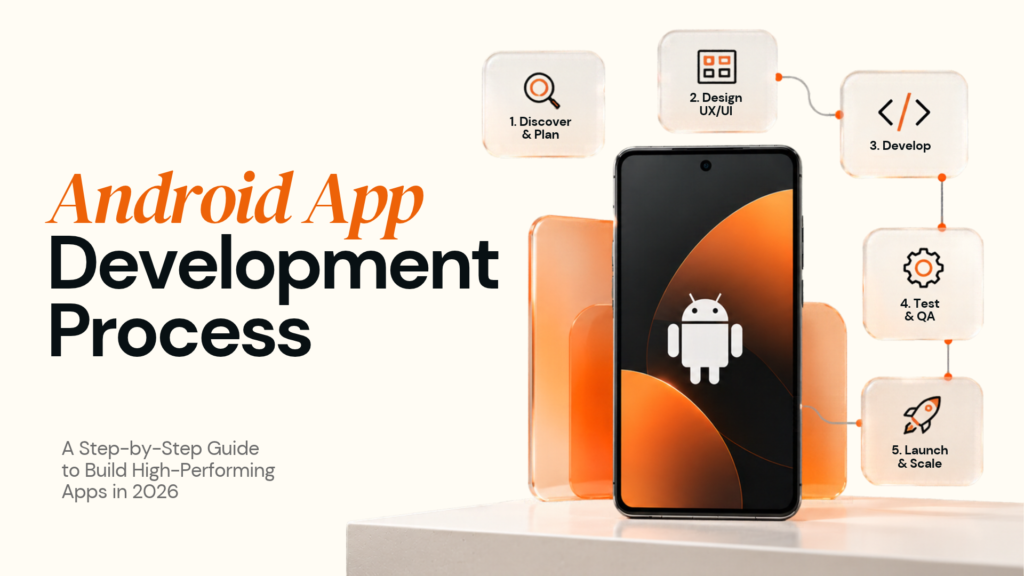
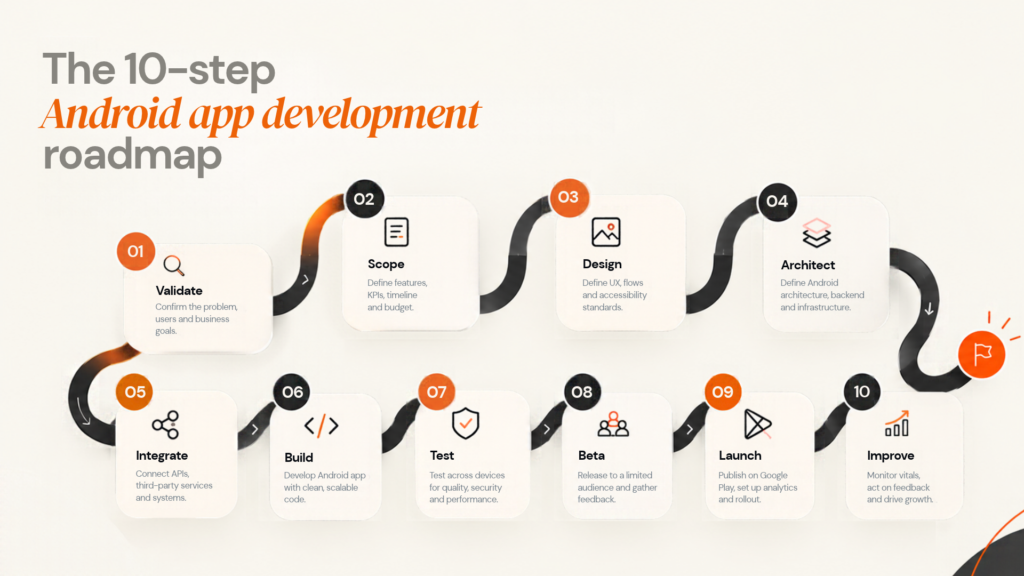
A practical ten-step process is: validate the idea, define the MVP, design the UX, choose architecture, plan integrations, build, test, beta test, launch and continuously improve.
03
What technology is used for modern Android development?
Modern native Android development commonly uses Kotlin, Android SDKs, Jetpack libraries and Jetpack Compose. Google's current guidance recommends clear architecture boundaries, repositories and unidirectional data flow.
04
Should I choose native Android or cross-platform development?
Use native Android when platform-specific hardware, performance or Android APIs are central to the product. Cross-platform development can be effective when Android and iOS need substantial shared functionality.
05
How do I design for tablets and foldables?
Use adaptive layouts rather than stretching a phone interface. Plan for different window sizes, orientations, foldable states, text scaling and interaction patterns.
06
How much does Android app development cost?
There is no universal price. Cost depends on product complexity, UX, backend architecture, integrations, device requirements, security, testing and ongoing maintenance.
07
How long does it take to build an Android app?
It depends on workflow complexity, integrations, backend work, device requirements, testing and product uncertainty. A reliable estimate should be based on defined scope and architecture.
08
What is an Android App Bundle?
AAB is Google's publishing format for distributing optimised APKs for users' device configurations. Google Play's current release documentation covers app bundles and signing.
09
What are the current Google Play target API requirements?
Since August 31, 2026, new apps and app updates generally need to target Android 16/API 36 or higher for Google Play submission, with separate requirements for some form factors. Existing apps generally need Android 15/API 35 or higher to remain available to new users on newer Android versions.
10
Do Android apps need ongoing maintenance?
Yes. Android versions, devices, dependencies, APIs and business requirements change over time. Maintenance includes compatibility, security, performance, bug fixes and new product capabilities.
11
How should I choose an Android app development company?
Review relevant case studies, architecture, device testing, security, integration capability, release process, maintenance model and the actual team assigned to the project.